

Also known as my mom's late birthday present.
I used a discarded frame (the glass was broken but the frame was sturdy and had the backing still). I went to the craft store to find a few of the accent pieces you'll see below. I also made the push pins myself and will have a step by step guide for those below.
1. Find a discarded frame, you don't need the glass, so instead of buying a new frame and trashing the glass, this is an upcycle project. Use one of your old frames that the glass broke in or find one at your local savers, goodwill, salvation army or other thrift store. You should look for one with the backing though- it will make your life easier, although you can make one without the backing. (Image below shows the frame without my backing):

2. I used the contact paper type roll of cork for my frame since it had the backing, you can use any frame you'll just end up paying more for the sturdier cork to place in your frame.

3. Measure the backing to get the right size of cork, once cut, remove cork backing so it's sticky and place on frame backing. (after securing the cork add your decorations):

4. For the Pin Portion, gather up some old bottle caps. We save ours each time we drink Virgil's Root Beer, and the rest of these were gifted to my friend from a local bar (who otherwise would have thrown them out- bottle caps are not recycle-able, they are, however, reusable!):

5. You will also need push pins. These 200 pack were from Staples for about $2.76 after tax. Michaels doesn't carry push pins- you're better off going to a local office store:

6. You will need a nail and a hammer to pre-punch the push pin hole in the bottle cap. I also reused the scrap cork to create a safe surface to nail into as to not damage my table:

7. Insert the Push Pin:

8. Side View of the Pin all the way in:

9. Using a 1 inch size round hole punch, punch out your desired pin insert. I used a scrap book page I thought would be simple, but I've also used magazine pages and photographs:

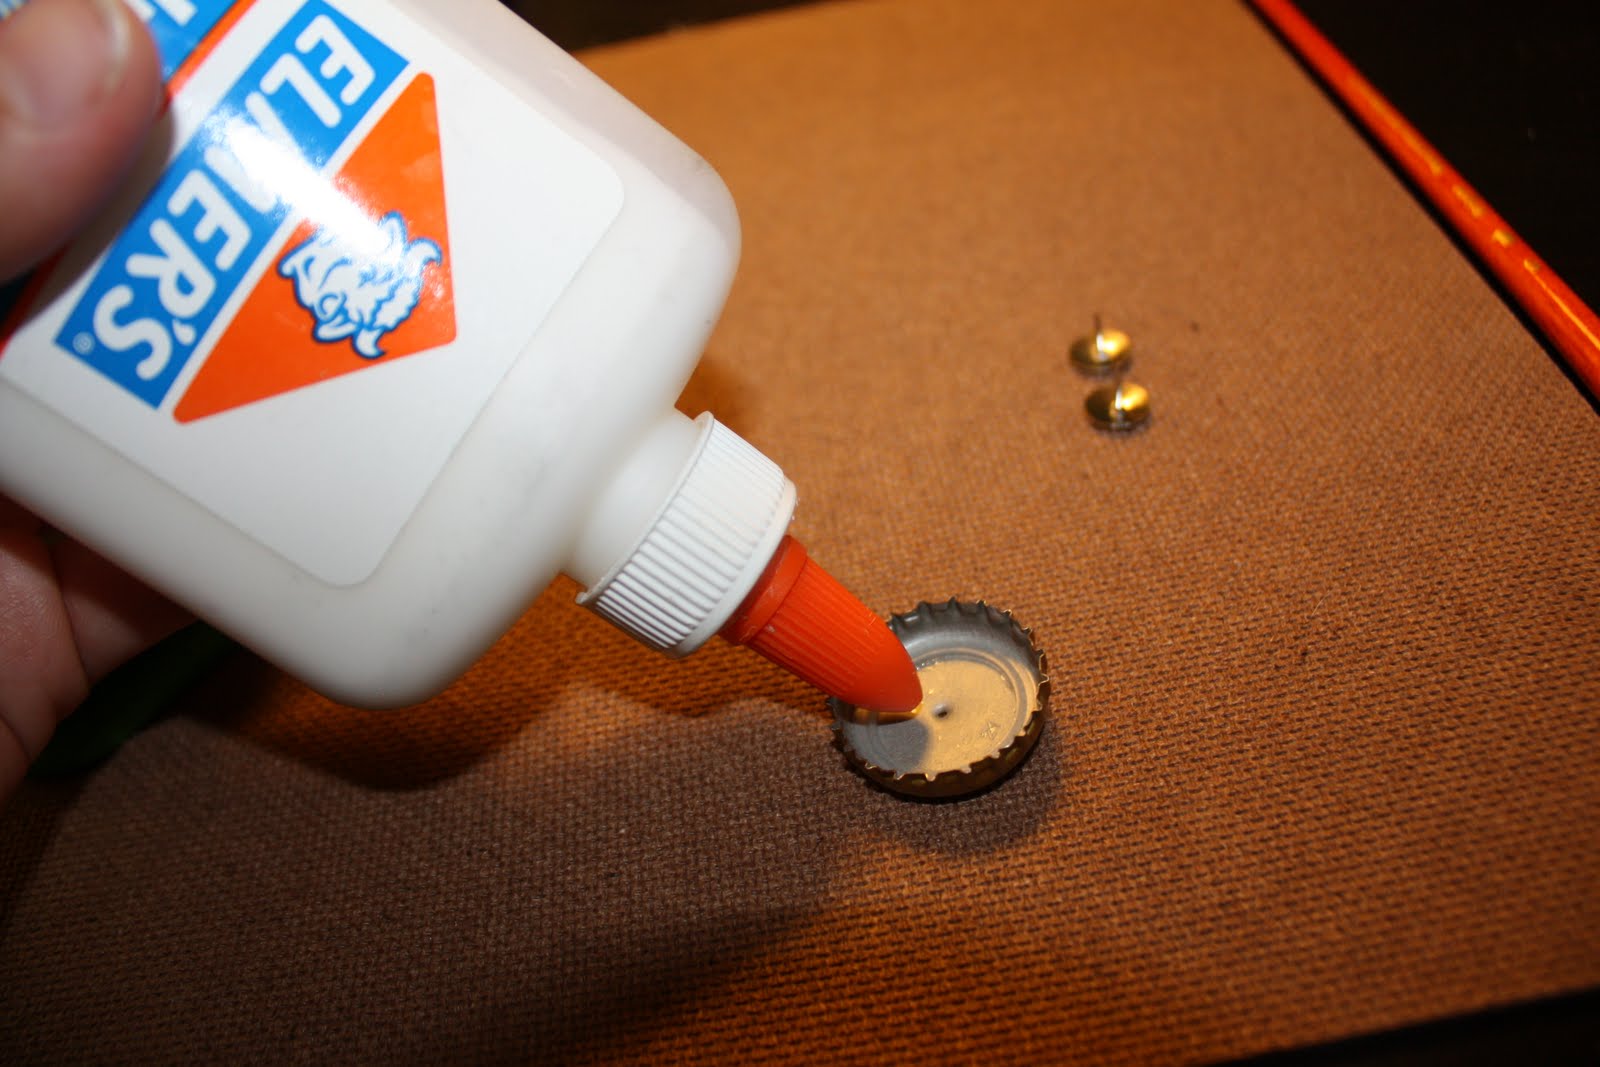
10. Add glue to the inside of the bottle cap (make sure your push pin is inserted, this photo is a dramatization and is missing the pin- do not copy this image!):
11. Drop in hole punched image:

12. Paint Mod Podge liberally to the inside of the bottle cap (I've also used 2 part epoxy for a glass filled appearance)

13. You should use at least this much Mod Podge. It will dry clear, and the thicker the better:

14. Put your cork and frame together while your Mod Podge filled caps dry (which can take as long as 2 days depending on how thick you filled them):

15. The Finished Gift with the push pins and decorations, I hope she likes it:
Happy Crafting and Cork Frame Making!
No comments:
Post a Comment