
That one time we completely renovated our bathroom and I forgot to blog about it...
 This last year, we started one of the biggest home renovation projects to date. It was a little too big for us so we called in a few professionals although keeping with our usual do it yourself mentality, we did the demolition ourselves. Oh and of course I chose every little detail, so it was exactly what I wanted in a bathroom. But I'm getting ahead of myself, let me start at the beginning...


The reference list:
white trim tile
subway tile {now discontinued}
custom new window from Home Depot 104.83
hexagon tile 325.46
faucets for sinks 236.09
concrete and painters tape 20.32
black tile trim 75.80
vanity and granite counter top $1298.00
mirrors like these 69.99x2
lighting fixtures $79.79x2
clawfoot tub 1400 plus shipping
you can find all my inspiration on my guest bathroom pinterest board


Excuse this low quality photo taken from the wesbite listing of our home when we bought it in 2009. Everything in our home was pink. Literally, every wall was light pink. EVERY. WALL.
After living at this home for a few years, I was finally disgusted by the bathroom so much that I didn't care what it cost or took, it NEEDED to be renovated so it jumped to the front of the list for household upgrades, we took out this gross mirror which was decaying at the bottom, and ripped out the new tile for the shower we had installed when we bought the house {they didn't put the right waterproofing behind the tiles and the wall was getting water damage}.
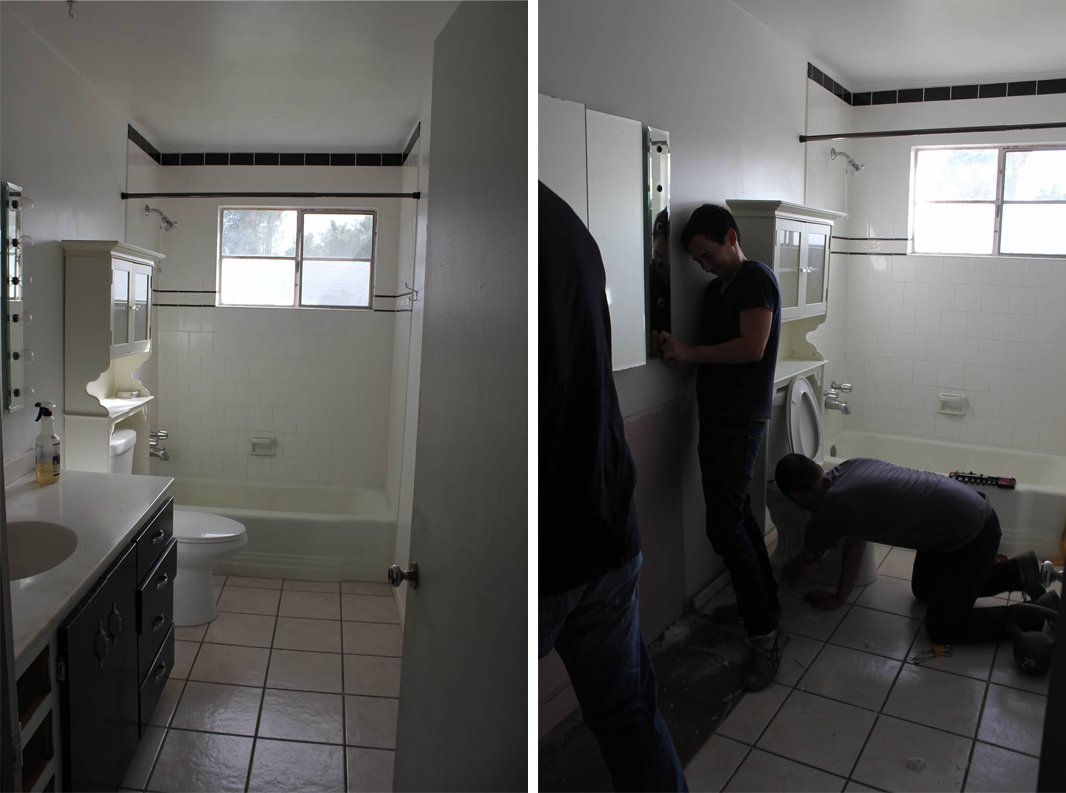
Left: proper before, this is what is looked like while we lived there, and thanks to Ryan, Wayne and Husband demo was completed in one day.
The boys had fun bashing the tile, although the tub was practically impossible to get out, we had to break apart the whole wall around it since it was cast iron.
Don't worry though I got my rage out on the shower tile.
Here's what it looked like once we got the tub out.
The boys loaded it up on the work truck and took it away. far away. {it was the original tub from 1959!}
While contruction was in progress, the tub, counter tops and tile were stored in my daughter's classroom.
My unle is an architect and I used his contractors this time. they did an amazing job waterproofing the wall, installing a much needed new window and eventually hanging a few finishing fixtures on the tile, which I was too scared to do for risk of shattering the tile,
The floor was uneven and they had to float the concrete under the tub and fill in a hole, but once they were done with that the room really started coming together.
It took about 3-4 weeks start to finish, because the window needed to be custom ordered and we didn't realize how long that would take, if we had had it already, the room would have taken about a week.
Things I learned:
1. demo yourself.
2. hire a pro for what you don't know
3. don't let Husband break his toe by dropping vanity on it.
4. make sure tub installers aren't chipping new tile while installing.
5. order EVERYTHING including windows and mirrors BEFORE starting construction, even if it means leaving it cluttered in your living room before starting, waiting after demo is the worst!
The reference list:
white trim tile
subway tile {now discontinued}
custom new window from Home Depot 104.83
hexagon tile 325.46
faucets for sinks 236.09
concrete and painters tape 20.32
black tile trim 75.80
vanity and granite counter top $1298.00
mirrors like these 69.99x2
lighting fixtures $79.79x2
clawfoot tub 1400 plus shipping
you can find all my inspiration on my guest bathroom pinterest board
Absolutely amazing job! I LOVE it! Subway tile is my favorite! Just gorgeous.
ReplyDeleteAunt Joanne
Fabulous :)
ReplyDeleteRenovation projects are quite challenging, but the result made it all worth it. Now your house is finally the home you've always wanted. And you also had the chance to deal with other problems, particularly in your bathroom and plumbing. Enjoy!
ReplyDeleteVincent Gerrits @ ServPro®